Hi everyone! My name is Kate Wilson and I am the newest member of the EdTechTeacher team as the Web Coordinator. This is my first attempt at Live Blogging so bear with me but I have gotten some great tips from Beth Holland and Jennifer Carey. I have also only heard great things about Greg Kulowiec so I am excited to start off the EdTechTeacher iPad Summit in San Diego in his session “Unleashing Creativity with App Smashing.”
Greg opens his talk with “I don’t like to focus on the Apps themselves but the concept of Unleashing Creativity.” He uses a great analogy to compare apps with the jet engine. They are all very powerful themselves but ultimately if you put them all together you have even more of a powerful impact.
What is app smashing?
Its simple following of a few basic steps:
1. Create content with one app
2. Created content with another app or apps
3. Merge content together (smashing)
4. Publish the content to the web

Why AppSmashing? How does it help learning?
Ruben Puentedura said at the last iPad Summit in Boston, “iPad is a curiosity amplifier.” Let students explore tools so they capture small snippets of complexity then process fracture thinking. AppSmashing allows students to show them what they know and what they don’t know to create a coherent, shareable story.
What does App Smashing look like?
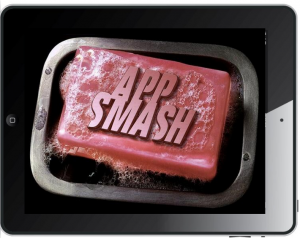
Carl Hooker created a great Fight Club like logo for App Smashing. The few rules of App Smashing is that you need apps that can export to the camera roll and pull from the camera roll. The last rule is that you have to get it off the iPad and share with the world!
If you open an app and there is something there then its not great for Smashing. The best apps for smashing have nothing in them. They make it possible to create and share.
App Fluency vs App Smashing
Fluency is jumping from one tool to a next with ease and conceptually you need to know how they all fit together. Smashing is putting together all those tools.
App Smashing ideas
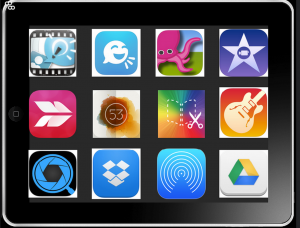
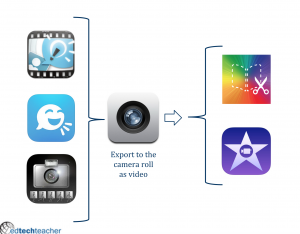
Make a Multimedia eBook: Capture the content in Explain Everything, Paper 53, iMotionHD for stop animation or iMovie then send to the Camera Roll then drops them in Book Creator then send to DropBox or Google Drive. Get it off your iPad, publish to share it with the world. Make it public. Get it out there to provide and audience. Put it on your schools facebook page or blog, tweet it out, or email to the parents. If you are concerned with having kids faces on the internet then you can always not show them in
This wasn’t possible with iOS5. Two years ago not possible. The pace of change is pretty rapid.
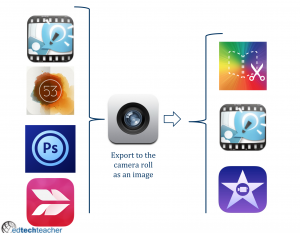
Make a Published Web-Book: Cpature in ExplainEverything, Page 53, Photoshop, or then export to the camera roll. Pull it in in Book Creator then export as PDF. You can then publish on issuu or flipsnack. Flipsnack has an edu version made for teachers to publish student work.
Make an Advanced Video: Capture the content with Explain Everything, Telegami, or iMotionHD then send it to iMovie (or if really advanced GarageBand) then share it on Vimeo or YouTube. If publishing to the web is a concern password protect on Vimeo or not make it public on YouTube.
There are no rules to AppSmashing you can jump over to the computer to finish up sometimes.
AppSmash Fight Club video:
AppSmash Round 1 from Greg Kulowiec on Vimeo.
ThingLink Smash: You can take snippets then pull them all together on Thing Link
RSA Animate Smash: Go from ExplainEverything to Camera Roll, to TiltShift to speed up the video then back to Camera Roll to iMovie in order voiceover. You can also go more real world by recording a kids hands on a dry erase board using the camera on the iPad. Then publish to the web. Also share it on twitter with #appsmash !
RSA Animate on An iPad from Greg Kulowiec on Vimeo.
Great student work examples with over 10,000 views!
Common Craft Style Video Smash: A great example for bringing in the analog and digital. Record cutouts the kids make in Explain Everything, then send to Camera Roll.
Green Screen App Smashing: Do Ink is a great app to turn your classroom into a Green Screen studio. You can layer footage in this app. The Do Ink blog has great student examples. Telgami is also a great app for creating an avatar and then pulling it into DoInk.
Another tip: you can do Picture in Picture in iMovie which can help explain a concept.
Collaborating & Publishing
Google Drive is great now for collaborating. Students can pull down videos and open in iMovie to make thier edits.
Smash-Blogging
Evernote and Postach.io is great for blogging on a mobile device. You create a notebook that turns your notes into blog posts and uses certain tags such as “page” to publish or “avatar” to add your photo to the blog.
Greg tried to use an iPad only for a month and blogged about it using this Smash: iOS experiment.
Digital Portfolio & Website Creation
Students can turn their smashes into a Digital Portfolio. Google Sites will pull in content directly from a Google Drive.
Verbs not Nouns
Its an EdTechTeacher philosophy to try and keep your apps to one screen to try and stay focused. The most important is sharing your content and using the tool that makes sense for your learning objectives. “Don’t start with the noun. Start with verbs and work back to the noun.” This means don’t say “I’ll use iMovie” but more “I want to tell a story about.”
More Learning Opportunities
- Greg will also be going over all this in an iLab tommorrow morning with Beth Holland.
- A link to his presentation can be found here: http://goo.gl/hhXHNN
- You can also follow him on his other blog.
- Lastly check out all resources on our website and attend a Summer Workshop or the ETT Summit


